SEO Fundamentals
branded domain vs keyword domain, domain name tips for seo, GoDaddy domain registration, Hostinger hosting for beginners, how long does it take for a website to be indexed, how to buy a domain and hosting, how to buy a domain name, how to buy web hosting, how to change nameservers, how to choose a domain name, how to choose website hosting, how to connect a domain to hosting, how to connect domain and hosting, how to get a website indexed, how to get website hosting, how to launch a new website, how to link a domain to a server, how to make a website live, how to point a domain to a server, how to point a domain to hosting, how to publish a website, how to put a website online, how to register a domain name, how to speed up google indexing, new website seo checklist, submit website to google, website launch seo checklist, website setup for beginners, where to buy a domain name
SEO Checker
0 Comments
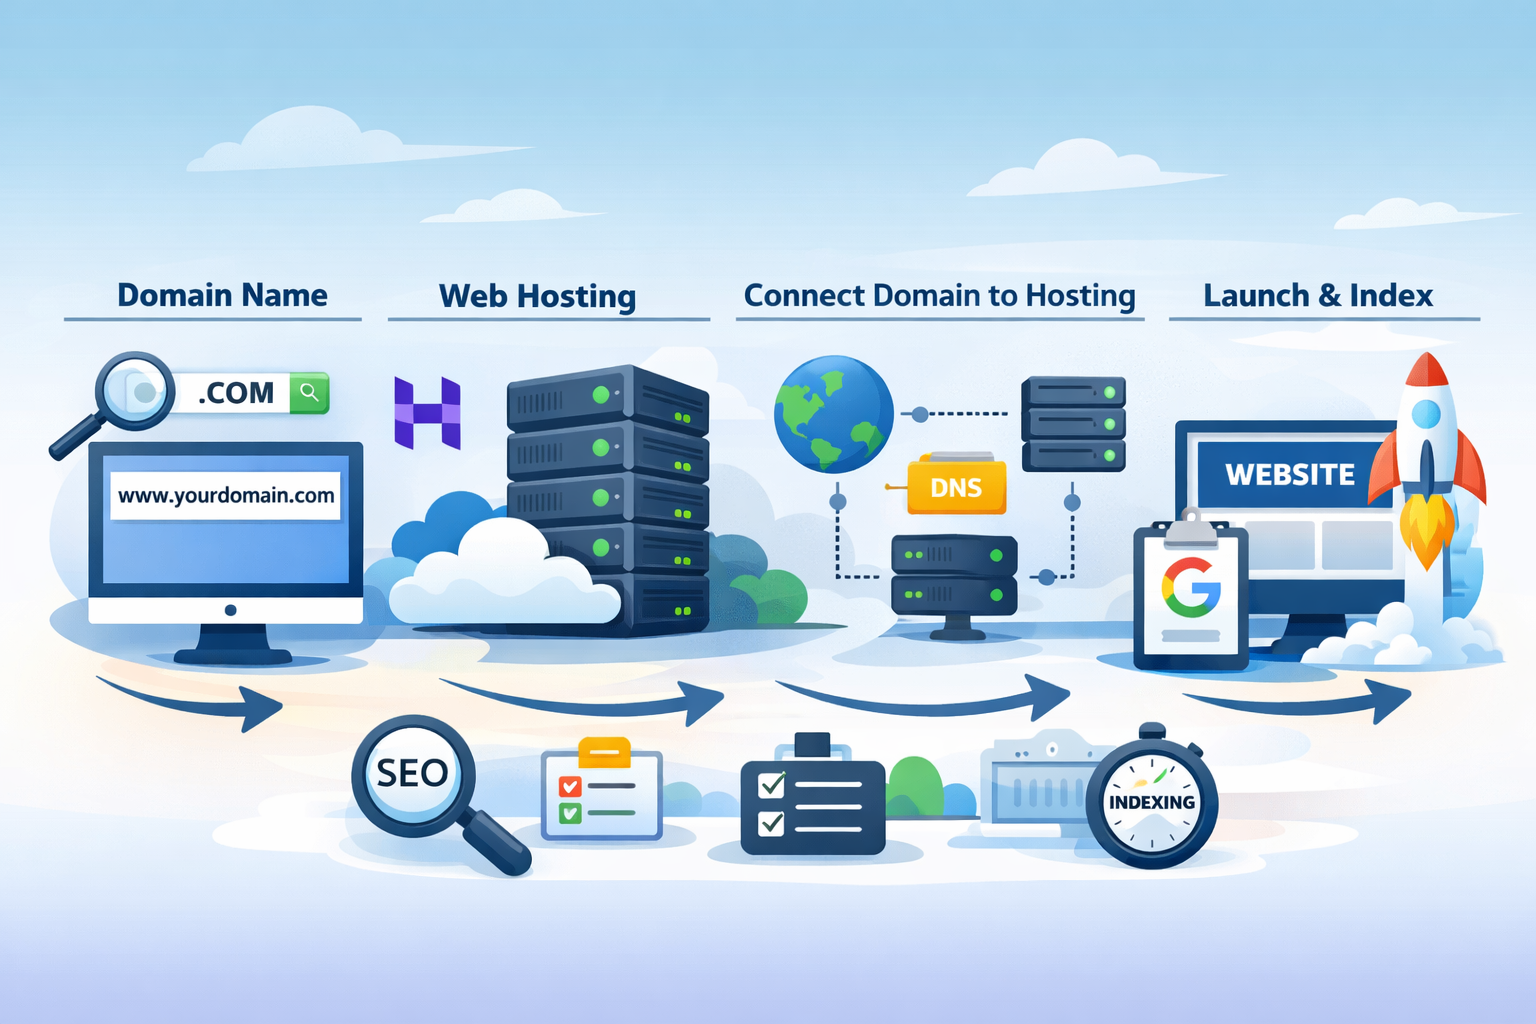
How to Buy a Domain, Get Hosting, Connect It All Together, and Get Your Website Indexed Faster
Getting a website live for the first time can feel much more confusing than it should.
Most beginners know they need:
- a domain name
- some kind of hosting or server space
- a website
- and a way to get it found in Google
But the gap between “I want a website” and “my site is live and indexable” is where many people get stuck.
They are not always sure:
- where to buy the domain
- what hosting actually is
- how a domain connects to a server
- whether they should choose a branded name or a keyword-based name
- how long indexing takes
- and what they can do to speed it up
This guide breaks that process down simply.
It covers:
- where and how to buy a domain name
- how to procure hosting or server space
- how a domain gets linked to a server
- how to choose a better domain name
- how long indexing usually takes
- and how to give a new site a better chance of being found faster
If you are launching a new site, this is the practical foundation you need.
Step 1: Buy your domain name
A domain name is your website address, such as:
- yourbusiness.co.uk
- siteacademy.co.uk
- example.com
You buy domains through a domain registrar. One well-known example is GoDaddy, which lets you search for available domain names, register them, and manage DNS settings from your account. GoDaddy explains that domain registration is the process of finding an available web address and registering it for your use, usually on an annual renewal basis.
In simple terms, the process is:
- Go to a registrar such as GoDaddy.
- Search for the domain name you want.
- See whether it is available.
- Add it to your basket.
- Choose how many years to register it for.
- Complete checkout.
- Manage the domain afterwards from your registrar account.
It is also worth remembering that you do not “own” a domain forever after one payment. You are registering the right to use it for the period you pay for, and if you let it expire, someone else may be able to register it.
Advice when choosing a domain name
This part matters more than people realise.
A domain name is not a magic ranking factor on its own, but it still affects:
- branding
- trust
- memorability
- clickability
- how established the business feels
There are usually two common directions people consider:
1. Branded domain names
Examples:
- siteacademy.co.uk
- amazon.com
- monzo.com
These are usually better if you want to build a proper brand.
A branded domain is often:
- easier to remember
- easier to grow with
- less restrictive
- more professional long term
- less likely to feel spammy
This is usually the better option for businesses that want to grow beyond one exact keyword or one narrow service.
2. Keyword-based domain names
Examples:
- londonplumberservices.co.uk
- bestseocheckeronline.com
These can sometimes make the topic of the site obvious quickly, but they can also:
- feel generic
- feel dated
- be harder to build into a memorable brand
- become restrictive if the business expands
- sometimes look lower quality if overdone
My honest advice
In most cases, go for a clean branded domain rather than trying to force exact keywords into it.
A good domain is usually:
- short
- easy to spell
- easy to say aloud
- hard to confuse
- relevant to the business
- not overly restrictive
If you can naturally include a service or category word without making it clunky, that can be fine. But forcing keywords into the domain is rarely the best long-term move.
For example:
- Great: BrightForge.co.uk
- Also fine: BrightForgeDigital.co.uk
- Weaker: Best-Digital-Marketing-Agency-London-SEO.co.uk
Think long term, not just “can I squeeze a keyword into the URL”.
Step 2: Procure hosting or server space
Once you have a domain, you need somewhere for the website files to live.
That is what hosting is.
Your hosting provider gives you the server space, resources, and management tools needed to store and serve your website to visitors. A provider like Hostinger offers several hosting types, including shared hosting, WordPress hosting, cloud hosting, and VPS. Hostinger describes shared hosting as beginner-friendly, cloud as a middle ground with more resources, and VPS as giving more back-end control and flexibility.
In simple terms:
- Shared hosting: cheapest and easiest for most small sites
- WordPress hosting: similar, but more tailored to WordPress users
- Cloud hosting: more resources, often better for busier sites
- VPS: more control, more responsibility, more technical
Using Hostinger as an example
Hostinger’s web hosting flow is straightforward:
- choose a hosting plan
- select the subscription length
- complete checkout
- then manage your site through Hostinger’s control panel (hPanel)
For most beginners or small businesses, shared hosting or managed WordPress hosting is usually enough to get started. You do not need a powerful VPS just to launch a normal brochure site, blog, or small business website. Hostinger itself positions shared hosting as ideal for beginners and small businesses, while suggesting VPS for users who need more control and flexibility.
What hosting should you choose?
A simple rule of thumb:
Shared hosting is usually enough if:
- this is your first website
- traffic will be low to moderate
- the site is a brochure site, blog, or small business site
- you want something easier to manage
Cloud hosting may be better if:
- you expect more traffic
- you want more resources without going full VPS
- you want extra breathing room for performance
VPS may be better if:
- you need more control
- you are comfortable managing server-level settings
- you are running bigger or more technical projects
Most people starting out should keep it simple. It is usually better to get launched on solid basic hosting than overcomplicate the setup.
Step 3: Link the domain to the hosting
This is the part many beginners find most confusing.
You have:
- a domain from a registrar like GoDaddy
- hosting from a provider like Hostinger
Now you need to connect them.
That connection usually happens through DNS settings.
The two most common ways to point a domain at hosting are:
- changing the domain’s nameservers
- or pointing the domain using DNS records such as an A record
The easiest route: nameservers
If you host with Hostinger and bought your domain somewhere else, Hostinger’s help guides explain that you first add the domain to your hosting plan, then connect it by using the nameserver values Hostinger provides.
In practical terms, it usually looks like this:
- Log in to your hosting account.
- Add the domain inside the hosting panel.
- Find the nameservers your host wants you to use.
- Log in to your domain registrar account.
- Open the domain’s DNS or nameserver settings.
- Replace the current nameservers with the host’s nameservers.
- Save the changes.
After that, the domain starts pointing at the hosting provider.
The more manual route: DNS records
Sometimes, instead of changing nameservers, you point the domain using:
- an A record for the root domain
- sometimes a CNAME for
www
That can be useful if you want to keep DNS managed at the registrar or through a separate DNS platform.
For beginners, nameservers are usually simpler.
How long does domain pointing take?
Not every DNS change happens instantly.
When you change nameservers or key DNS records, it can take time for that change to propagate across the internet. That is why a domain may work for one person before another, or may still show the old setup for a while after you update it. Hostinger’s guidance also notes that after nameserver changes, you may need to wait for propagation to complete.
In practice, some changes happen fairly quickly, while others can take longer. It is normal for it not to feel instant.
Step 4: Build and publish the website
Once the domain is connected to hosting, you can:
- install WordPress
- upload your files
- use a site builder
- or deploy your application
At that point, the website becomes live on the domain.
But live does not automatically mean indexed.
That is the next stage.
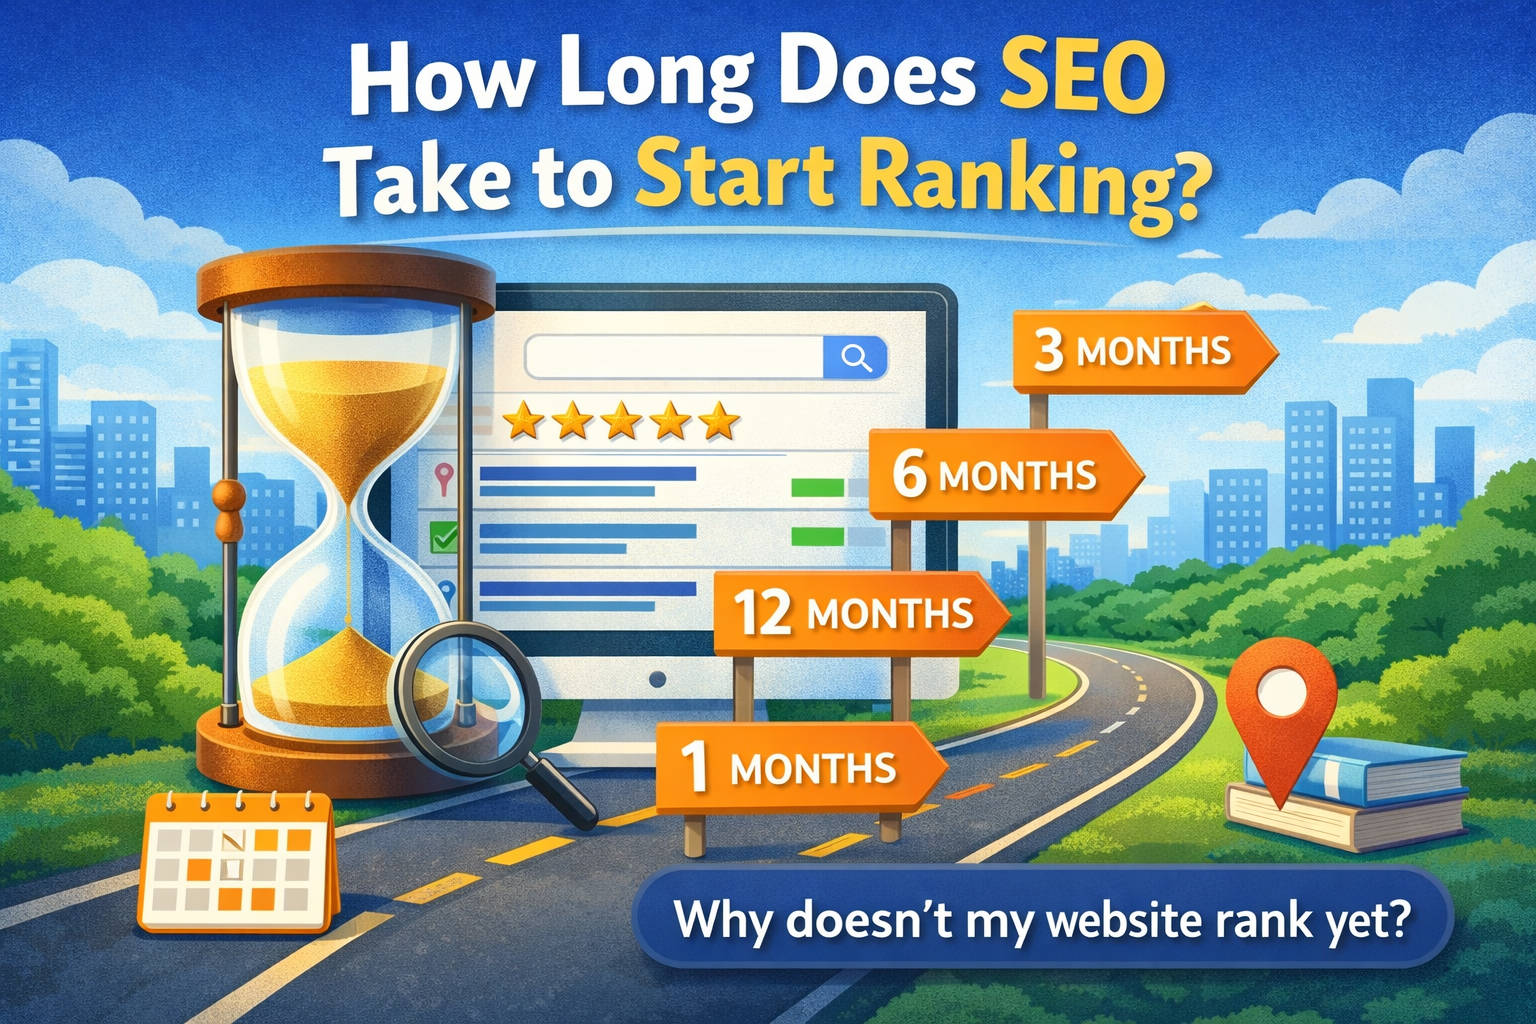
How long does it take for a new site to be indexed?
There is no guaranteed timeframe.
Some pages can be discovered and indexed quickly.
Some take longer.
Some are crawled but not indexed straight away.
Google’s own guidance says you can request re-indexing for pages you manage after adding or changing them, and Search Console’s URL Inspection tool lets you inspect a URL and test whether it is indexable.
So the honest answer is:
- it can be quick
- it can take days
- sometimes longer for brand-new sites with little authority
For a new website, a rough expectation is that indexing can happen anywhere from a few days to a few weeks, depending on factors like crawl discovery, internal links, technical setup, and how easy the site is for Google to find and trust. That timing is an informed estimate rather than a guaranteed Google SLA. It is best treated as a normal range, not a promise.
How to speed indexing up
You cannot force Google to index a site instantly, but you can absolutely improve the chances of faster discovery and cleaner indexing.
1. Set up Google Search Console
This should be one of the first things you do.
Search Console helps you:
- verify site ownership
- inspect URLs
- see indexing status
- request indexing for specific pages
- monitor coverage and indexing issues
2. Use URL Inspection and request indexing
Google’s URL Inspection tool lets you inspect a specific page, test whether it appears indexable, and request indexing for pages you manage.
That does not guarantee immediate indexing, but it is one of the best official ways to prompt discovery.
3. Make sure the page is actually indexable
Check that your site or page is not blocked by:
- a
noindextag - robots.txt rules
- the wrong canonical tag
- broken status codes
- accidental private/staging settings
A site can be live and still have technical blockers.
4. Add the site to your XML sitemap
Your sitemap helps search engines discover important URLs more clearly. Search Console can then use that information as part of understanding your site structure and coverage.
5. Link to the new page internally
Google discovers a lot through links.
If your new page is orphaned and nothing links to it, discovery can be slower.
At minimum:
- link from the homepage if relevant
- link from navigation if appropriate
- link from related pages or blog posts
6. Keep the site crawlable and useful
Thin, half-finished, or weak pages are less compelling than pages that are:
- complete
- useful
- structured clearly
- easy to crawl
- fast enough to load
7. Get a few real external mentions or links
A brand-new site with no links or mentions can take longer to gain traction.
Even a few real signals can help, such as:
- a business profile
- directory listings where relevant
- social profiles
- a link from another website you control
- a partner or supplier mention
A simple beginner setup example
Here is what the process looks like in plain English.
Example setup
- You buy
mybusinessname.co.ukon GoDaddy. - You buy shared hosting from Hostinger.
- You add the domain inside Hostinger.
- Hostinger gives you nameservers.
- You log in to GoDaddy and update the domain’s nameservers.
- You wait for DNS propagation.
- You install WordPress on Hostinger.
- Your site goes live.
- You set up Google Search Console.
- You submit the sitemap and request indexing for the homepage.
- You build out your core pages and make sure they are linked properly.
That is the basic journey from:
idea → domain → hosting → live website → indexing
One extra point: do not overcomplicate the first launch
A lot of people delay launching because they get stuck comparing:
- 20 domain registrars
- 15 hosting providers
- every hosting plan type
- every possible domain variation
It is good to think carefully, but do not let that turn into paralysis.
A sensible first setup is usually:
- a strong branded domain
- reliable beginner-friendly hosting
- a clean website structure
- Search Console setup
- indexability checks
- a few strong core pages
That is enough to get moving.
Use Site Academy to check the site properly
Once the site is live, it is important to check whether the fundamentals are actually in place.
That is where the Free SEO Checker at Site Academy is useful.
It helps review both:
- on-site SEO, such as titles, headings, canonicals, indexability, internal links, missing metadata, content and technical issues
- and wider off-site SEO signals that affect trust and growth
That means once your domain is live and pointing correctly, you can use Site Academy to check whether the site is genuinely in a good position to be crawled, indexed, and improved.
Final thought
Launching a website is usually less about one big technical challenge and more about understanding the order of the steps.
You need:
- a domain name
- hosting or server space
- a connection between the two
- a live site
- and a clean route into indexing
If you are starting from scratch, keep it simple:
- buy the domain from a registrar such as GoDaddy
- get hosting from a provider such as Hostinger
- point the domain to the hosting via nameservers or DNS
- publish the site
- verify it in Search Console
- request indexing
- and check the setup properly with Site Academy’s free SEO checker
That is the foundation.
Once that is right, everything else becomes much easier.
Share this content:
Post Comment